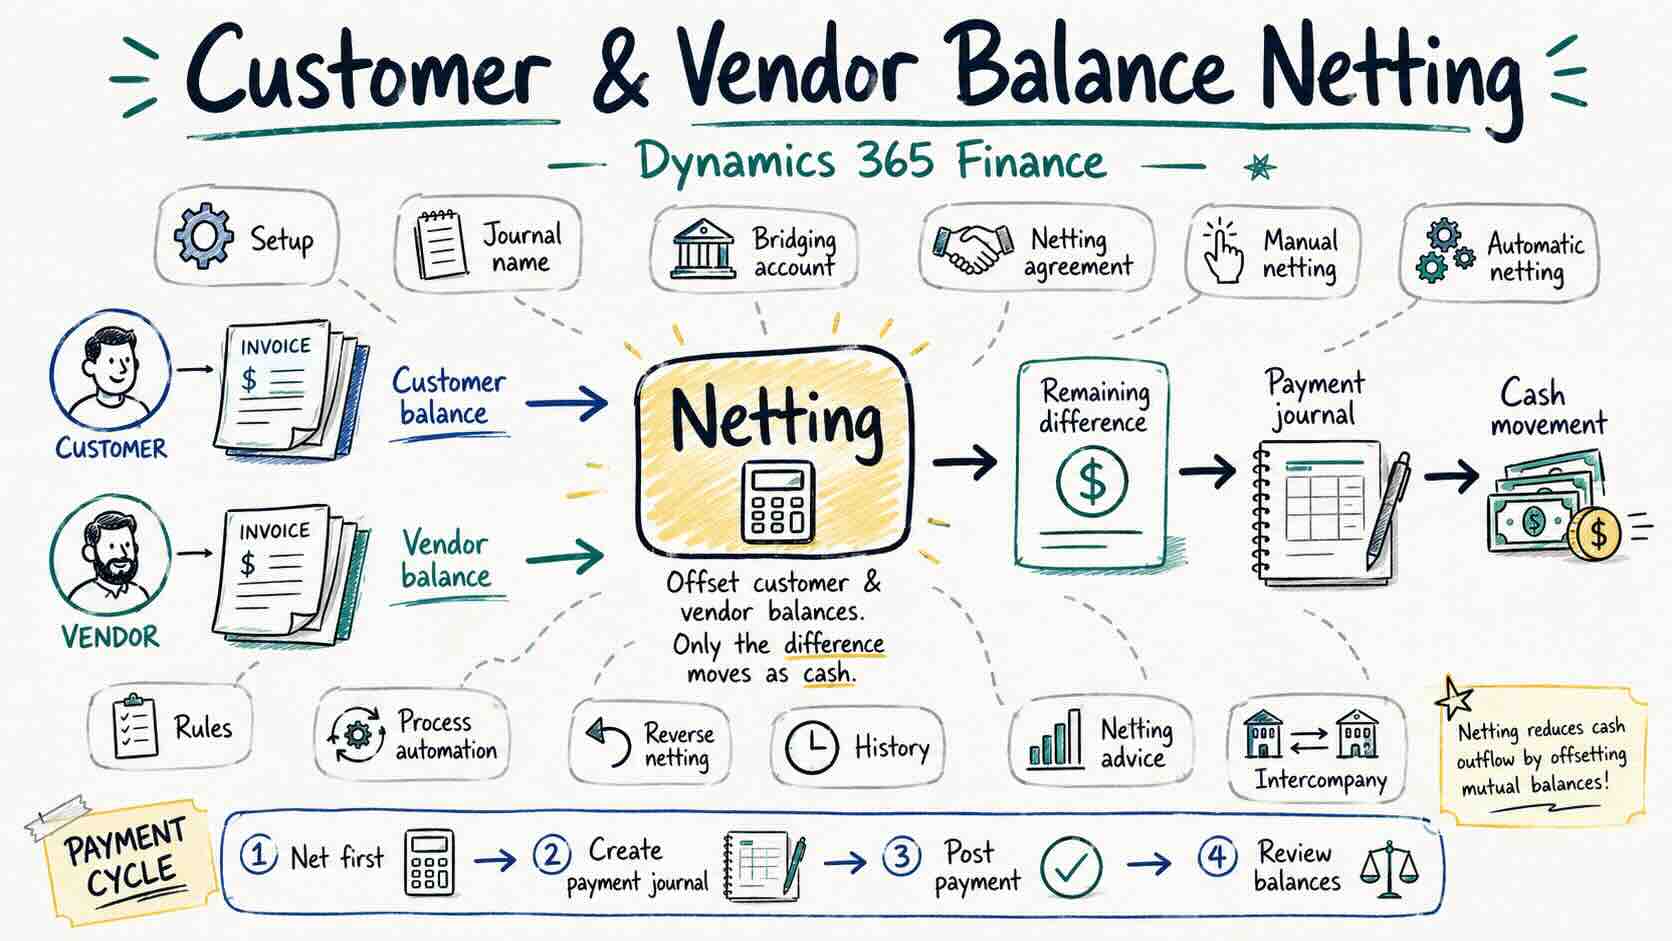
When a trading partner is both a customer and a vendor, you often end up paying them an invoice while they still owe you on another. Customer and vendor balance netting offsets those balances against each other so only the remaining difference moves as cash. The result is fewer payments and receipts, lower transaction fees, and a cleaner balance with that party.
This article walks through the full netting feature in Dynamics 365 Finance: the one-time setup, manual netting, automatic netting with rules and process automation, reversing a netting, viewing history, and intercompany netting across legal entities.
How netting fits into the payment cycle
Netting is designed to run before you create a payment journal. The intended flow is:
- Run netting to offset customer and vendor balances, leaving only the remaining open amounts.
- Create the payment journal for those remaining amounts.
- Submit and post the payment, which updates the customer and vendor balances.
- Review balances after posting to confirm accuracy.
- Repeat before each payment run.
Transactions that are already included in a payment journal are not picked up by netting. To verify which transactions are already marked for settlement, use Accounts payable > Periodic tasks > All marked transaction details.
Set up a journal name and main account
When customer and vendor invoices are selected for netting, Finance automatically posts a netting journal that settles both sides. That journal needs a journal name and a bridging main account defined up front.
- Create a journal name with the journal type Customer and vendor netting.
- Create a main account to act as the bridging (interim) account for netting.
Set up a netting agreement
A netting agreement holds the pairs of customer and vendor accounts that may be netted, and it controls the effective period. The agreement must be configured and activated before any netting transaction can be created.
- Go to Cash and bank management > Netting > Netting agreement.
- Create a record and enter a name and description.
- Select the journal name you defined earlier.
- Select the bridging main account you defined earlier.
- Select the financial dimension values.
- On the Parties FastTab, add a vendor account and a customer account as a pair.
- Activate the netting agreement.
Manual netting
With manual netting you pick the open invoices yourself. Finance calculates the netting amount as the smaller of the two balances, then posts a netting journal with two lines: one settles the selected customer invoices and the other settles the selected vendor invoices.
- Go to Cash and bank management > Netting > Customer and vendor balances netting.
- The page lists every customer/vendor pair available for netting. Select a pair, then select Create netting.
- Select the open customer invoices and open vendor invoices to net, then select Post.
Automatic netting
For volume, define a netting rule and run it through a batch job or the process automation framework.
Set up a netting rule
- Go to Cash and bank management > Netting > Netting rule.
- Create a record and enter a name and description.
- Select a netting sequence, which controls the order in which invoices are netted:
- By due date – From oldest to newest
- By due date – From newest to oldest
- By invoice balance – From largest to smallest
- By invoice balance – From smallest to largest
- Select the netting agreement scope. All includes every active agreement; Selected lets you define a specific agreement list.
- Set Include credit note and debit note to Yes or No.
- On the Netting criteria FastTab, optionally restrict the rule to specific vendor accounts, customer accounts, or invoice currency.
- Activate the netting rule.
Run automatic netting
There are three ways to run it:
- A one-time run from the Automatic netting button on the Customer and vendor balances netting page.
- A one-time run from Automatic netting on the Netting menu in Cash and bank management.
- A scheduled, recurring run from Process automation on the Netting menu.
Reverse a netting
If a netting was posted in error, you can reverse it. This unsettles the affected customer and vendor invoices and reverses the posted netting journal.
- Go to Cash and bank management > Netting > Customer and vendor balances netting.
- Select Netting history.
- Select the netting transaction, then select Reverse netting.
View history and print netting advice
The Netting history page shows the cleared pairs from both manual and automatic netting for a selected agreement, and lets you print a netting advice to send to the customer or vendor as a netting notification.
- Go to Cash and bank management > Netting > Customer and vendor balances netting.
- Select Netting history.
- Select the netting transaction, then select Print netting advice.
For an inquiry view of netted transactions between customer and vendor pairs, go to Cash and bank management > Inquiries and reports > Netting > Netting history.
Intercompany netting
When the customer and the vendor live in different legal entities, you can net across companies.
- Go to Cash and bank management > Setup > Cash and bank management parameters.
- On the Netting tab, enable Allow intercompany netting.
- Go to Cash and bank management > Netting > Netting agreement.
- On the Parties FastTab, set the Customer legal entity and add a customer account.
- Set the Vendor legal entity and add a vendor account. Either the customer legal entity or the vendor legal entity must match the legal entity that holds the agreement.
- Activate the netting agreement.
Each intercompany netting posting generates three vouchers: two in the legal entity that holds the agreement and one in the counterparty legal entity. For example, with USMF holding the agreement and DEMF as the counterparty:
| USMF – Netting000000001 | Debit | Credit |
|---|---|---|
| Accounts receivable | 100.00 | |
| Interim netting | 100.00 |
| USMF – Netting000000002 | Debit | Credit |
|---|---|---|
| Interim netting | 100.00 | |
| Intercompany debit | 100.00 |
| DEMF – ICJL000001 | Debit | Credit |
|---|---|---|
| Intercompany credit | 100.00 | |
| Accounts payable | 100.00 |
Summary
Netting collapses offsetting customer and vendor balances into a single net position so you exchange only the difference. Set up the journal name and bridging account once, build and activate a netting agreement for each pair, then net manually for one-off cases or with a netting rule and process automation at scale. Run it before each payment run, and use Netting history to reverse, audit, or send netting advice.